

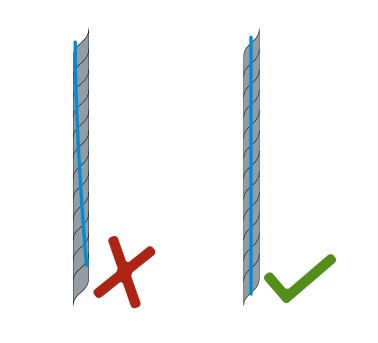
Rope alignment
The i-LINE comprises many advantages
• Easy and correct installation
• Maximum user safety
• Optimum product performance
• Color code for rope type identification
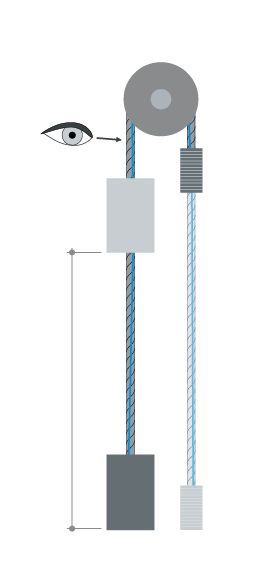
Installation Height
Admissible rotations depending on the installation height
| installation height | rotation around the rope axis | |
| m | ft | |
| 30 | 100 | 1 |
| 60 | 200 | 2 |
| 90 | 300 | 3 |
| 120 | 400 | 4 |
| 150 | 500 | 5 |
| 180 | 600 | 6 |
| 210 | 700 | 7 |
| 240 | 800 | 8 |
| 270 | 900 | 9 |
| 300 | 1000 | 10 |
For 2:1 installations the values double
I-LINE – Installation-Line
In the event of untwisted ropes
1. Count number of rotations of surface line during one complete car ride.
2. If necessary turn the rotation of the rope back until there is no more rotation of the I-line
3. Fix the end fittings of the rope against rotation
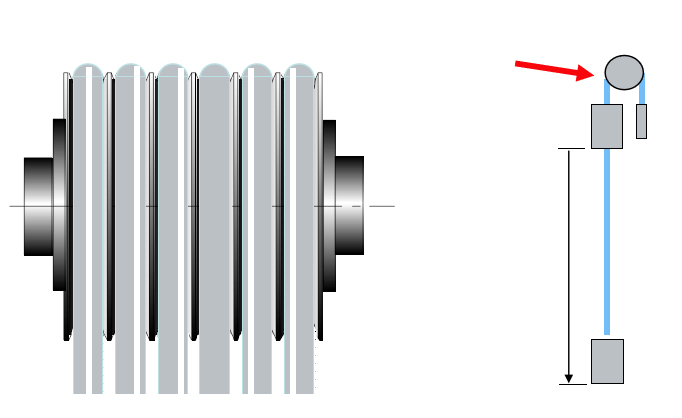
Groove
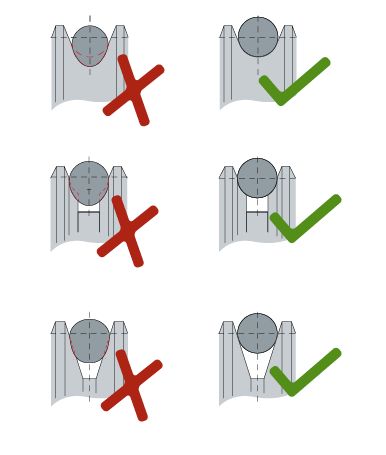
Shape
The correct geometrical form of the traction sheave grooves is important for the rope service life. During the service life of the rope the traction sheave grooves are subject to wear caused by friction stress (slippage and slippage due to stretch). Due to the stress (traction-, bending-, transverse- and friction stress) during operation, the rope diameters and the groove shape change (See picture on the left). The rope diameter of new ropes is usually bigger and may not fit into existing lower, run in and tighter traction sheave grooves. When using new ropes the groove type therefore has to be checked (radius gauge). If the traction sheaves deviate strongly from the ideal condition, they have to be replaced or, if possible, re-turned.

Rope tension
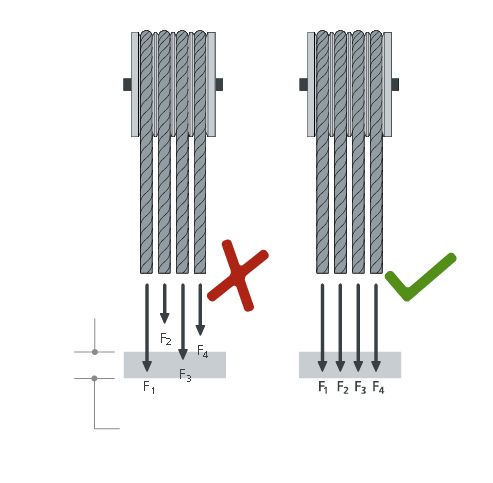
Check the rope tension immediately after mounting with a suitable device, for example the RPM BRUGG. Make sure that all ropes in the rope group are evenly tensioned. Repeat the rope tension check 3 months after the commissioning of the installation and later on in regular intervals.
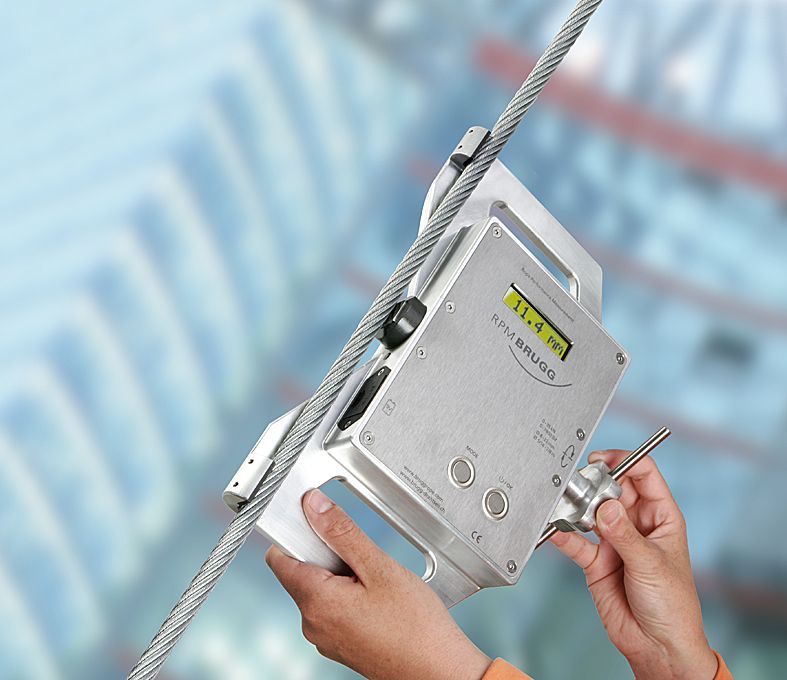
RPM in use
1.Actual rope diameter: 11.4 mm
2. Actual rope tension: 8.7 kN
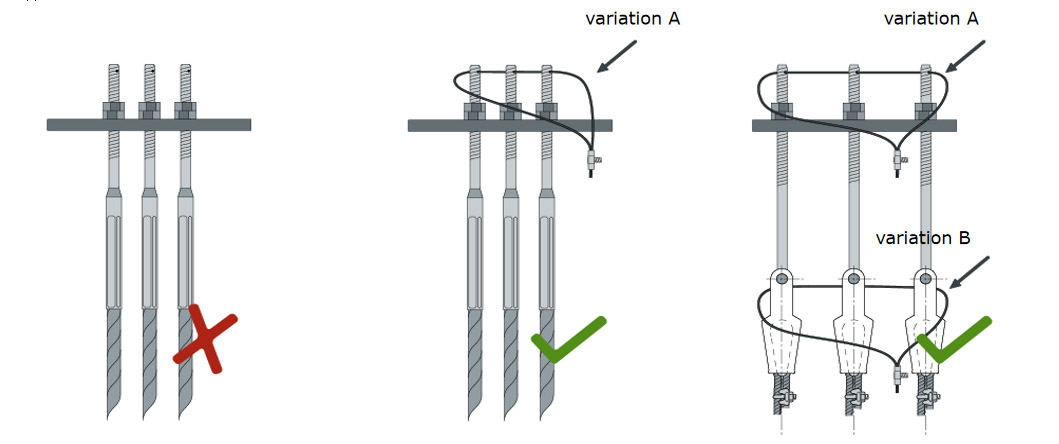
Anti rotation device
Ropes must be secured against rotation immediately after completion of installation, before operating the elevator.
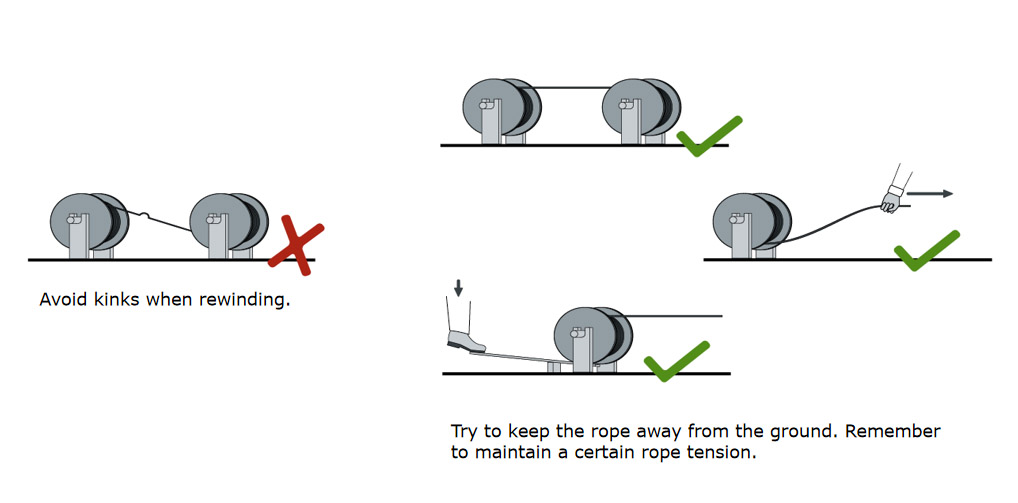
Rope handling
Rewinding
Installation

Post time: Mar-18-2022